How to Propagate Zebra Plant: Easy Tips for Stunning Growth in 2025
Have you ever wondered how to multiply your favorite plants, transforming a small collection into a thriving indoor jungle?
If you’re someone who loves the vibrant beauty of plants, you might have considered how to propagate zebra plant as a way to expand your greenery and share it with others.
The zebra plant, with its striking striped leaves and compact growth, is one of the most popular choices for plant lovers.
Its eye-catching appearance and relatively low-maintenance care requirements make it a favorite in many homes and offices.
But did you know that learning how to propagate zebra plant is easier than you might think? Whether you’re an experienced plant enthusiast or a beginner just starting to dip your toes into propagation, you’ll find that this plant is incredibly forgiving and can be easily propagated with a little patience.
Propagation is more than just a fun way to grow your plant collection; it’s a rewarding process that allows you to share your beloved zebra plants with friends or even create beautiful gifts.
Plus, it’s a great opportunity to learn and master a skill that’s incredibly valuable to anyone interested in plant care.
With the right knowledge and a few simple steps, you can soon be on your way to learning how to propagate zebra plant and enjoy the satisfaction of watching new plants flourish.
Stay with me, and let’s explore this exciting journey of propagation!
What Is a Zebra Plant and Why Propagate It?
When considering how to propagate zebra plant, it’s essential to understand what makes this plant so special and why it’s worth the effort.
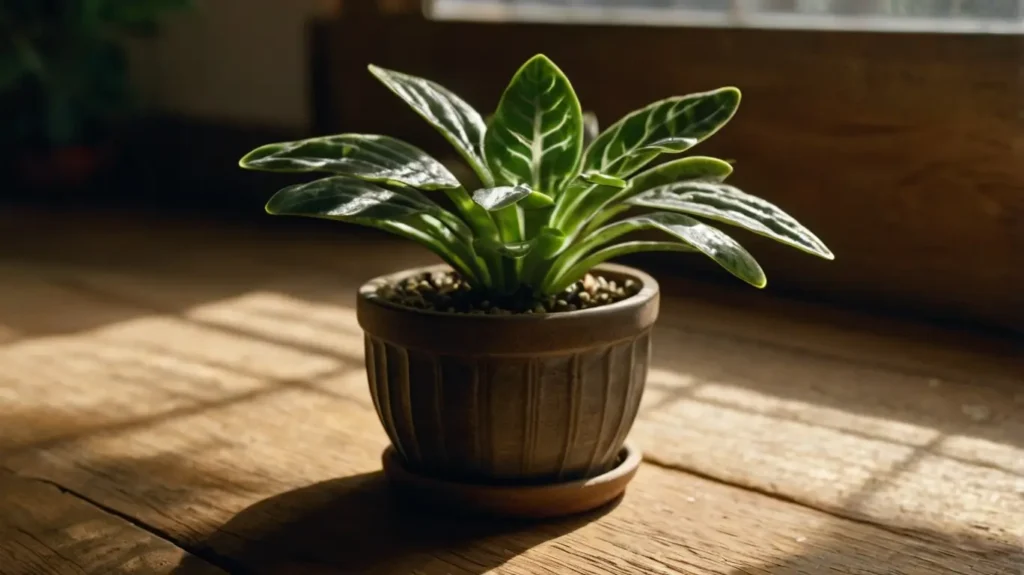
The zebra plant, scientifically known as Haworthia attenuata (or sometimes called the Zebra Haworthia), is a stunning succulent that has gained popularity in households for its striking visual appeal and ease of care.
What is a Zebra Plant?
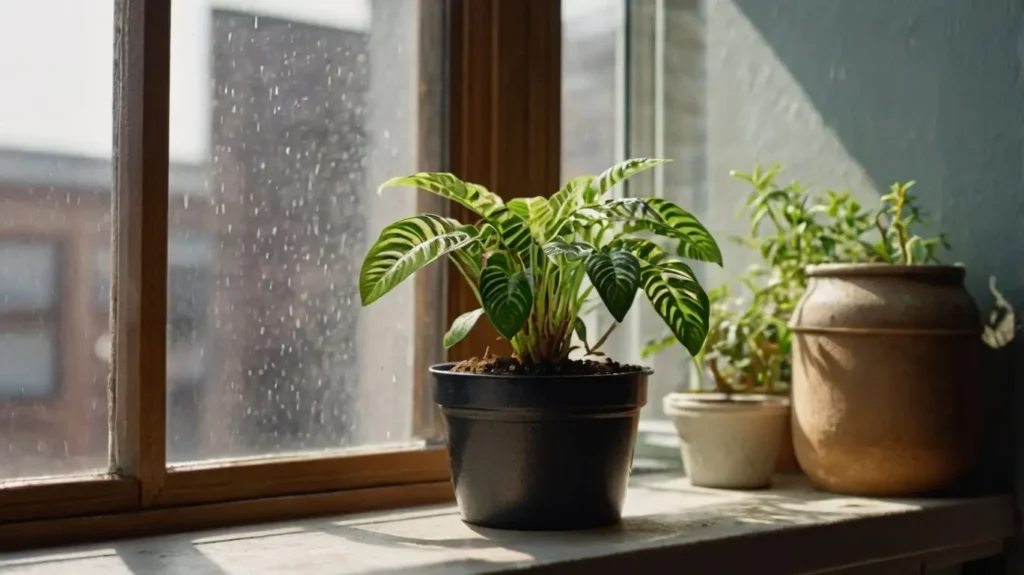
The zebra plant is a small succulent native to Southern Africa. It is known for its unique green leaves adorned with white, horizontal stripes, which resemble the pattern of a zebra’s coat – hence the name.
This plant, often grouped with other succulents in the Haworthia genus, thrives in bright, indirect light and well-drained soil, making it an excellent addition to both beginner and experienced plant lovers’ collections.
The zebra plant’s ability to adapt to a range of environments, from bright windowsills to slightly shaded spots, contributes to its popularity.
It doesn’t require constant attention and can tolerate infrequent watering, making it perfect for busy individuals or those just starting to dip their toes into plant care.
Its small size and striking appearance also make it a great decorative choice for offices, desks, and even shelves.
Why Propagate Zebra Plants?
Now that you know what makes the zebra plant so wonderful, you might be wondering: Why propagate it? There are several compelling reasons to learn how to propagate zebra plant, even for beginners.
1. Multiply Your Plants
One of the main advantages of propagating zebra plants is the ability to multiply your collection.
Whether you’re looking to fill out your plant displays or simply want to expand your plant family, how to propagate zebra plant offers an accessible and affordable way to grow more plants without needing to buy new ones.
With just a few simple steps, you can create multiple zebra plants, making them perfect for filling different areas of your home or giving as thoughtful gifts.
2. Save Money
Instead of purchasing multiple zebra plants, propagation allows you to grow your own at home, which can save you money.
Whether you want to create more plants for your own home or as gifts for friends, learning how to propagate zebra plant can make growing your indoor garden more cost-effective.
3. Gifting Your Plants
A fantastic benefit of propagating zebra plants is that they make excellent gifts. If you have plant-loving friends or family members, a rooted zebra plant is a thoughtful and personal present.
The process of sharing a plant you’ve propagated yourself creates a meaningful connection, and it’s a gift that keeps on giving.
4. Stronger Plants and Better Genetic Diversity
By propagating zebra plants, you’re not only increasing your collection – you’re also ensuring the health of your plants. New plants grown from cuttings or offsets typically develop strong roots and are less susceptible to diseases.
Additionally, propagating zebra plants can improve their genetic diversity, ensuring a robust and thriving plant population.
In short, how to propagate zebra plant is an enjoyable and valuable process that enhances your gardening experience while providing long-lasting rewards, from multiplying your plants to sharing them with others.
Whether you’re an experienced gardener or just starting out, propagation is an essential skill for anyone looking to grow their collection of these stunning plants.
Understanding the Basics of Zebra Plant Propagation
If you’re eager to learn how to propagate zebra plant and add more of these delightful succulents to your collection, it’s essential to understand the basics of the process.
Whether you’re a seasoned gardener or just getting started with propagating houseplants, following the right steps at the right time can make all the difference in the success of your propagation efforts.
When to Propagate?
The best time to propagate zebra plants is during their active growing season, which typically occurs in spring and summer.
During these months, the plant is most vigorous, producing new growth that’s ideal for propagation. Propagating your zebra plant during this time will give it the best chance of developing strong roots and establishing itself as a healthy new plant.
By focusing on these seasons, you are more likely to see successful rooting and faster growth in your new plant.
While it is technically possible to propagate a zebra plant at other times of the year, waiting until it’s actively growing ensures the highest chances of success.
Tools Needed for Successful Propagation
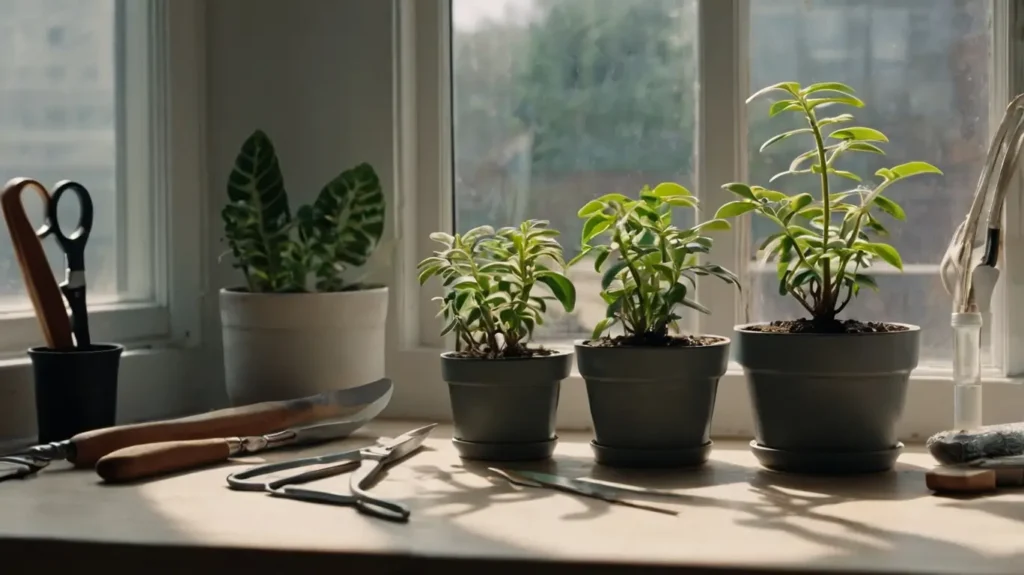
Before diving into the propagation process, let’s talk about the tools you’ll need. Having the right tools can make the job easier and more efficient.
Here’s a list of the essential tools required to learn how to propagate zebra plant successfully:
1. Clean, Sharp Scissors or Pruning Shears
A sharp pair of scissors or pruning shears is crucial for taking clean, precise cuttings from your zebra plant. Clean cuts will reduce the chances of infection and allow the plant to heal faster.
When choosing your shears or scissors, make sure they’re disinfected to avoid transmitting any bacteria or fungi to your plant. You can use rubbing alcohol or a diluted bleach solution to sanitize them before use.
2. Small Pots or Containers
After you’ve taken your cutting, it’s time to plant it in a pot or container where it can establish roots. Select small pots with good drainage holes to prevent water from accumulating, which could cause the cutting to rot.
Make sure the pot is large enough to accommodate the cutting without crowding, but small enough to allow the plant to focus on root development.
3. Soil Mix for Propagation
For the soil, opt for a well-draining mix that’s suitable for succulents. A cactus or succulent mix works well, as it ensures proper water drainage and allows your cutting to root without being waterlogged.
If you don’t have a pre-made succulent mix, you can make your own by combining regular potting soil with sand and perlite for extra drainage.
4. Rooting Hormone (Optional)
While not always necessary, rooting hormone can help accelerate the rooting process and give your cutting a better chance of success. Rooting hormone contains auxins that promote root growth, and it’s especially useful if you’re working with a plant that can be slow to propagate.
Simply dip the cut end of your zebra plant cutting in rooting hormone before planting it in the soil.
5. Clean Container for Water (Optional)
If you prefer to propagate your zebra plant in water, use a clean glass container that allows you to see the roots develop.
Fill the container with water, ensuring that only the bottom part of the cutting is submerged. Change the water every few days to keep it fresh and prevent any stagnation.
By having the right tools on hand, you’ll be well-equipped to learn how to propagate zebra plant and increase your chances of success.
Whether you’re propagating in soil or water, using sharp, clean tools and ensuring proper conditions for your plant will set you up for success.
How to Propagate Zebra Plant: Step-by-Step Guide
Learning how to propagate zebra plant can be an incredibly rewarding experience, whether you’re looking to expand your plant collection or share the beauty of your zebra plants with friends.
Follow this easy step-by-step guide to successfully propagate your zebra plant, ensuring that each new cutting grows strong and healthy.
Step 1 – Select a Healthy Zebra Plant for Propagation
The first step in learning how to propagate zebra plant is to choose the right plant. Selecting a healthy, mature zebra plant is crucial to the success of your propagation efforts. Here’s what to look for:
- Healthy Leaves: Make sure the zebra plant has vibrant, firm leaves with no signs of disease or damage. Avoid plants with brown spots, wilting, or yellowing leaves.
- Strong Roots: If you’re taking offsets (pups) with roots, ensure the plant’s root system is robust. This helps the new plants thrive once propagated.
- No Stress: Choose a plant that is not stressed from overwatering, pest damage, or other factors. A healthy plant will yield the best results when propagating.
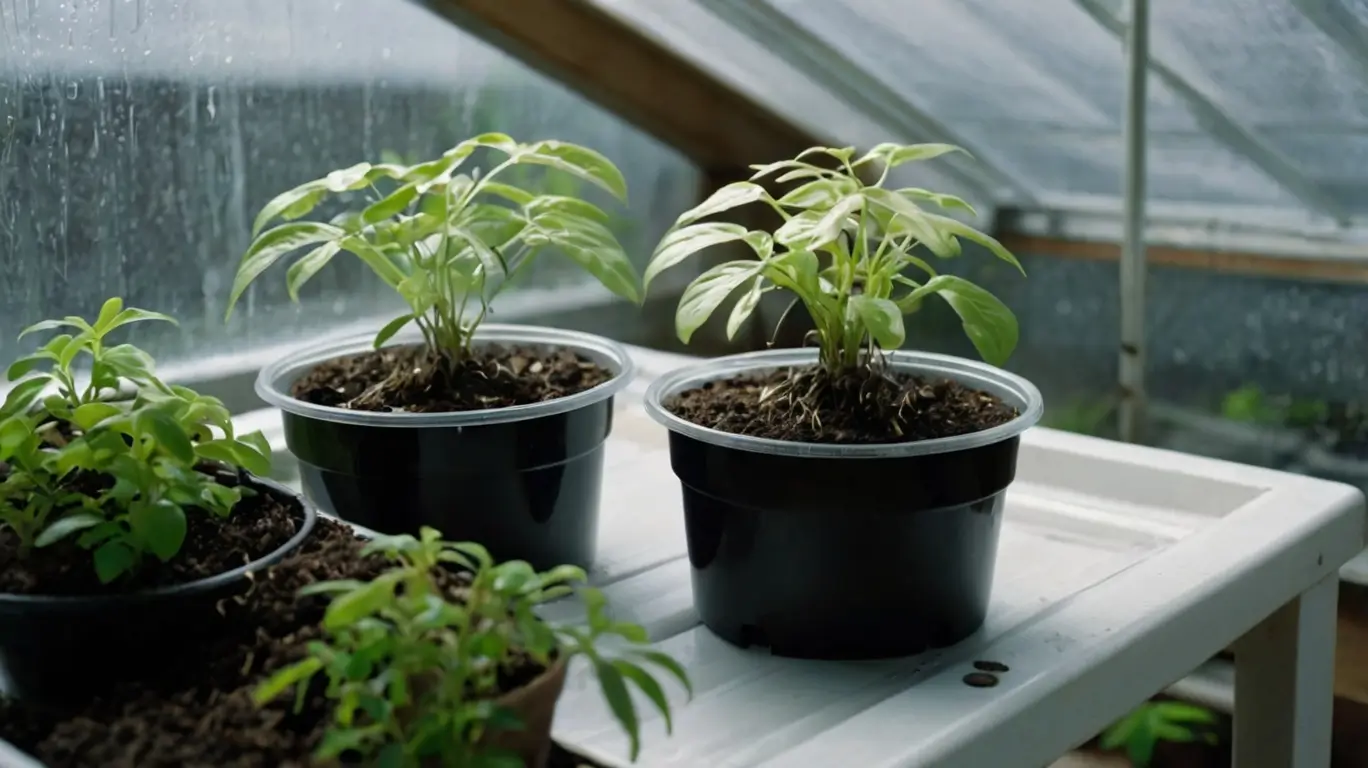
Step 2 – Cut the Offsets (Pups)
The next step in how to propagate zebra plant is to separate the offsets, or “pups,” from the main plant. These small baby plants are the key to propagation. Here’s how you do it:
- Remove the Offsets Gently: Carefully pull apart the pups from the base of the main plant. If they are attached too firmly, use sterilized scissors or pruning shears to make a clean cut.
- Sterilize Your Tools: To prevent any infection or damage, always use clean, sterilized scissors or shears when cutting. This is especially important when handling multiple plants or working with a plant you intend to propagate.
- Check for Roots: Ideally, the pups should already have small roots attached. If they don’t, don’t worry – they will root in either water or soil once separated.
Step 3 – Rooting in Water or Soil
Now that you’ve cut the pups, the next step in how to propagate zebra plant is deciding whether to root them in water or soil. Both methods can be successful, but each has its advantages:
Water Method:
- Prepare a Clean Container: Place the pup in a clean glass container. The water should cover the roots, but make sure that the rest of the pup doesn’t get submerged.
- Monitor the Water Level: Keep an eye on the water level, and change it every few days to keep it fresh. This will help prevent any bacteria or mold from developing.
- Wait for Roots: Over the course of a few weeks, you’ll start to see small roots growing from the bottom of the pup. This indicates that the propagation is successful!
Soil Method:
- Prepare a Pot with Well-Draining Soil: Choose a small pot with a good-quality, well-draining potting mix suitable for succulents.
- Plant the Pup: Gently place the cutting into the soil and lightly water it. Ensure that the soil is not too soggy, as excess moisture can lead to rot.
- Keep it Moist: The soil should be kept slightly moist during the initial rooting period, but never soaked.
Both methods are effective, so choose whichever works best for you and your growing conditions.
Step 4 – Wait for Root Development
At this point, you’ll need to wait for the new pup to develop roots, which is one of the most critical stages in how to propagate zebra plant.
This process can take a few weeks to a month, depending on conditions like temperature and light. Here’s how to monitor progress:
- Warm, Bright Location: Keep the newly propagated pups in a location that’s warm, bright, and indirect sunlight. Avoid placing them in direct sunlight, as it could scorch the delicate new plants.
- Patience is Key: Rooting takes time, so be patient! Avoid disturbing the pups too often. If you’ve propagated in water, you’ll see roots developing at the base. In soil, check for resistance when gently tugging on the plant to feel if the roots have begun to establish themselves.
Step 5 – Transplanting the Propagated Zebra Plant
Once your new zebra plant has developed a strong root system, it’s time to transplant it into its permanent home.
This step in how to propagate zebra plant is essential to ensuring the plant continues to thrive. Here’s how you can do it:
- Choose a Small Pot: Select a pot that is slightly larger than the root ball, allowing space for growth but not too much extra room that could cause waterlogging.
- Plant the Pup: Gently transplant the pup into the pot with fresh, well-draining soil. Be careful not to disturb the roots too much.
- Care for Your New Plant: Keep your newly propagated zebra plant in indirect light and establish a regular watering routine. Avoid overwatering, as this can lead to root rot.
By following these five simple steps, you’ve learned how to propagate zebra plant and can now enjoy the satisfaction of watching your new plants grow strong and healthy.
Common Mistakes to Avoid When Propagating Zebra Plants
Propagating zebra plants can be a simple and rewarding process if you follow the right steps. However, there are several common mistakes that can hinder the success of your efforts. Here are some of the most common pitfalls to avoid:
Overwatering
One of the most frequent mistakes when propagating zebra plants is overwatering. While it’s important to keep the soil moist during the propagation phase, it’s easy to overdo it.
Overwatering can lead to root rot, which is a serious issue for zebra plants.
To avoid this, make sure you’re not saturating the soil. Let it dry out slightly between waterings. If you’re propagating in water, ensure the water is changed regularly to prevent stagnation, which can also promote rot.
Using Dirty Tools
Using unsterilized tools can lead to the spread of diseases or infections among your plants. Always ensure your scissors, shears, or any tools you use are clean and sterile before making any cuts.
This is particularly important when working with multiple plants or cuttings, as pathogens can transfer easily from one plant to another. A quick wipe with rubbing alcohol is all it takes to disinfect your tools before getting started.
Not Providing Enough Light
Zebra plants need bright but indirect light to grow and propagate successfully. Placing your zebra plant in low light conditions can cause it to grow weak and leggy, which reduces the likelihood of successful propagation.
While they’re tolerant of indirect light, direct sunlight can scorch the leaves. Keep your propagated zebra plants in a location with plenty of light but avoid placing them in harsh, direct sun.
Best Practices for Taking Care of Your Propagated Zebra Plant
Once you’ve propagated your zebra plant, proper care is essential for helping it thrive. Below are some best practices to follow for your newly propagated zebra plants:
Watering Tips
Zebra plants prefer to have their soil dry out between waterings. Overwatering is a common mistake, as it can lead to root rot. Always check the soil moisture before watering.
If the top inch of soil feels dry to the touch, it’s time to water.
If you’re propagating in water, ensure the roots are submerged but not the entire pup, and change the water every few days to prevent stagnation.
Light Requirements
Zebra plants thrive in bright, indirect light. Place them near a window with filtered sunlight or use sheer curtains to reduce the intensity of direct sunlight.
If your plant isn’t getting enough light, it may start to look leggy or weak. Keep the plant in a bright spot, but make sure it’s shielded from the harsh afternoon sun to avoid leaf burn.
Repotting and Growth
As your propagated zebra plant grows, you may need to repot it into a larger pot. A good indication that it’s time to repot is when you notice the plant outgrowing its current container or if the roots are visible at the surface or through the drainage holes.
Be sure to choose a pot that’s about 2 inches larger than the current one, and use a well-draining soil mix suitable for succulents.
How to Speed Up Zebra Plant Propagation
While zebra plant propagation is typically a patient process, there are some ways to speed things up. Here are two methods you can try to accelerate root development:
Using Rooting Hormone
Rooting hormone can help stimulate faster root growth in your zebra plant cuttings. By applying a small amount of rooting hormone to the base of the cutting before placing it in water or soil, you can encourage quicker root formation.
Though it’s not always necessary, rooting hormone can be particularly helpful if you want to speed up the process.
Creating a Humid Environment
Zebra plants thrive in humidity, so creating a more humid environment can help speed up the propagation process.
You can place your plant cutting in a humidity dome or cover it loosely with a plastic bag to trap moisture around the plant. Just make sure the bag or dome isn’t touching the plant directly, and ventilate it occasionally to prevent mold buildup.
FAQ: Frequently Asked Questions About Propagating Zebra Plants
How long does it take to propagate a zebra plant?
Propagation typically takes anywhere from 3 to 6 weeks, depending on whether you’re using water or soil.
In water, you can see roots develop within 2 to 3 weeks, while rooting in soil may take a bit longer. The timeline also depends on factors like temperature and light conditions.
Can you propagate zebra plants from leaves?
Zebra plants are typically propagated using offsets (pups) rather than leaves. While it’s theoretically possible to propagate from leaves, it’s much more difficult, as they generally do not develop roots like other succulents.
Offsets are the most effective and reliable method for how to propagate zebra plant.
How do I know when my propagated zebra plant is ready for transplanting?
Once your zebra plant has developed a solid root system, it’s time to transplant it into a permanent pot. You’ll know it’s ready when you can gently tug on the cutting, and it resists being pulled up.
At this point, the roots should be well-established, and your plant can start thriving in its new home.
Can zebra plants be propagated in low light conditions?
Zebra plants require bright, indirect light to propagate successfully. While they can survive in low light, they won’t root as quickly or grow as vigorously.
For the best results, provide them with a spot that receives plenty of indirect sunlight during the propagation process.
Conclusion
Now that you know how to propagate zebra plant successfully, you can multiply your plant collection with ease. By following the steps outlined in this guide and avoiding common mistakes, you can ensure that your zebra plant cuttings grow strong and healthy.
Not only will you be able to enjoy the beauty of multiple zebra plants in your home, but you’ll also have the joy of sharing your newfound plant babies with friends and family.
Table: Quick Guide for Zebra Plant Propagation
| Step | Watering | Light Requirements | Additional Tips |
|---|---|---|---|
| Select a Healthy Plant | N/A | Bright, indirect light | Choose healthy offsets |
| Cut the Offsets | Light watering | Indirect light | Use sharp, clean scissors |
| Rooting | Water or soil method | Indirect light | Keep humid |
| Transplanting | Water as needed | Bright, indirect light | Repot when roots are strong |